How to Stop Recurring Seepage With Basement Waterproofing

Recurring seepage rarely starts as a dramatic flood. More often, it begins with a damp line along the wall, a musty smell that gets stronger after rain, or a small patch of efflorescence that keeps returning no matter how many times it is scrubbed off. Homeowners often describe it as a nuisance at first. Then a few storms pass, stored boxes get ruined, paint starts blistering, and that nuisance turns into a persistent building problem.
The frustrating part is that seepage is rarely solved by one quick fix. A coat of waterproof paint, a tube of sealant, or a new dehumidifier may improve symptoms for a while, but recurring water usually means the basement is losing the larger battle against moisture pressure, drainage failures, or both. Basement Waterproofing works when it addresses the path water takes, the force pushing it inward, and the weak points where the building gives way.
I have seen basements that stayed dry for twenty years suddenly begin leaking because one downspout extension went missing. I have also seen homeowners spend money twice because the first repair treated a crack while ignoring the saturated soil outside. If seepage keeps coming back, the solution is not just to block water. It is to understand why the water is there in the first place.
Why seepage keeps returning
Water around a foundation is predictable. It follows gravity, collects where drainage is poor, and pushes through vulnerable areas when enough hydrostatic pressure builds up. That pressure is one of the main reasons recurring seepage is so stubborn. Even a small amount of water in the soil can become a large problem when it has nowhere else to go.
A basement is below grade, which means the surrounding soil often holds more moisture than the concrete can comfortably resist over time. Concrete is durable, but it is not magical. It can crack. Mortar joints can weaken. Cold joints where the wall meets the footing can open up. Pipe penetrations can loosen. Older homes are especially vulnerable, but newer basements leak too, usually because site drainage or exterior detailing was never done well in the first place.
Another reason seepage returns is that many repairs focus on the visible leak rather than the source. If water shows up at one wall corner, that corner may not be the true entry point. It may simply be where water finally emerges after traveling behind framing, along the top of the footing, or through the wall cavity. Chasing wet spots without tracing the moisture path often leads to repeat repairs and repeat disappointment.
Seasonal changes complicate things further. Spring thaws, back to back storms, frozen gutters, and long wet periods all alter how water behaves around a house. A basement can stay dry during ordinary rain and then seep during a once a year event that exposes hidden weaknesses. That does not mean the problem is mysterious. It usually means the drainage system has very little safety margin.
The first question to ask: where is the water really coming from?
Before choosing a waterproofing method, separate actual seepage from condensation. The two are often confused, especially in summer. Condensation forms when warm, humid air meets cool basement surfaces. Seepage comes through the structure. The signs overlap, but the remedies are different.
True seepage tends to leave clear clues. You may notice water stains rising from the floor line, mineral deposits on masonry, rust on bottom track fasteners, soft drywall near the slab, or puddling after rain. Condensation usually appears more generally on pipes, ductwork, or large cool wall surfaces during humid weather, often without a direct connection to rainfall.
A simple field check can help. Tape a square of clear plastic to the wall and leave it for a day or two. If moisture forms behind the plastic, the wall is likely transmitting water. If moisture forms on the room side, interior humidity is probably the main culprit. This is not a substitute for a full assessment, but it is a useful first read.
Recurring seepage most often enters in a few predictable places:
- the cove joint where the wall meets the floor
- shrinkage or settlement cracks in poured concrete
- mortar joints in block walls
- around service penetrations such as water, gas, or conduit lines
- through window wells that fill faster than they drain
These are not random weak points. They are the places where materials change, movement occurs, or drainage tends to fail.
Start outside before tearing up the basement
The cheapest waterproofing work is often done above ground. That may not be exciting to hear if you are expecting an interior drain system to solve everything, but exterior water control should always be the first layer of defense. Many seepage problems can be reduced dramatically by keeping roof runoff and surface water away from the foundation.
Look at the house during or just after a heavy rain. This tells you more than a dry weather inspection ever will. Watch where gutters overflow, where splash blocks dump water, and whether water ponds near the foundation. Soil should slope away from the house, not flatten out or tilt back toward it. Even a few low spots near a corner can funnel a surprising amount of water down the wall.
Downspouts matter more than most homeowners realize. A typical roof section can shed hundreds of gallons during a moderate storm. If a downspout discharges one foot from the wall instead of six or ten feet away, that water often ends up right against the footing. Extend it. Secure it. Make sure it stays connected.
Window wells are another common offender. If the well fills with debris, the drain clogs, and the well becomes a small pond pressed against the basement window. Once water rises high enough, it finds its way inside through frame joints, sill areas, or wall cracks nearby. Cleaning the well and restoring proper drainage can stop what looks like a major leak.
I once looked at a finished basement where the homeowner was certain the wall membrane had failed. Water appeared in the same area after every hard rain. The actual problem was twofold: one gutter joint leaking directly beside the corner, and a flower bed built up above the original grade. After correcting the discharge and regrading the bed, the seepage stopped without any interior demolition. That is not every case, but it happens often enough to check first.
When exterior drainage is the real fix
There are times when surface corrections are not enough. If the surrounding soil stays saturated, if the wall is visibly deteriorating, or if water enters along multiple points despite proper gutters and grading, exterior waterproofing may be the right answer.
This is more invasive work, but it addresses the issue at the source. Proper exterior Basement Waterproofing usually involves excavation down to the footing, cleaning the foundation wall, repairing cracks or defects, applying a waterproof membrane, protecting that membrane with a drainage board where appropriate, and installing or restoring footing drainage. Done well, it relieves hydrostatic pressure and stops water before it touches the interior face of the wall.
This approach is especially effective when there is accessible excavation space, severe wall dampness, or evidence that the original dampproofing has failed. It is also often the best route when a basement will be fully finished and the owner wants the driest possible envelope from the outside in.
The trade-off is cost and disruption. Excavation can disturb landscaping, hardscaping, decks, porches, and walkways. In tight urban lots, access can be difficult or impossible. There are also situations where digging along an older wall must be handled carefully to avoid destabilizing adjacent soils. That is why exterior work should be planned by someone who understands foundations, not just waterproof coatings.
A membrane alone is not enough if drainage is still poor. I have seen expensive exterior jobs underperform because the contractor applied a membrane but did not create a reliable path for water to move down and away. Waterproofing and drainage are a pair. Separate them, and the system becomes vulnerable.
Interior systems have a real place, but they need to be honest about what they do
Interior Basement Waterproofing systems are often misunderstood. A good interior drain system does not make water disappear inside the wall. It manages water after it enters or reaches the footing level, collecting it before it spreads across the basement floor. That is an important distinction.
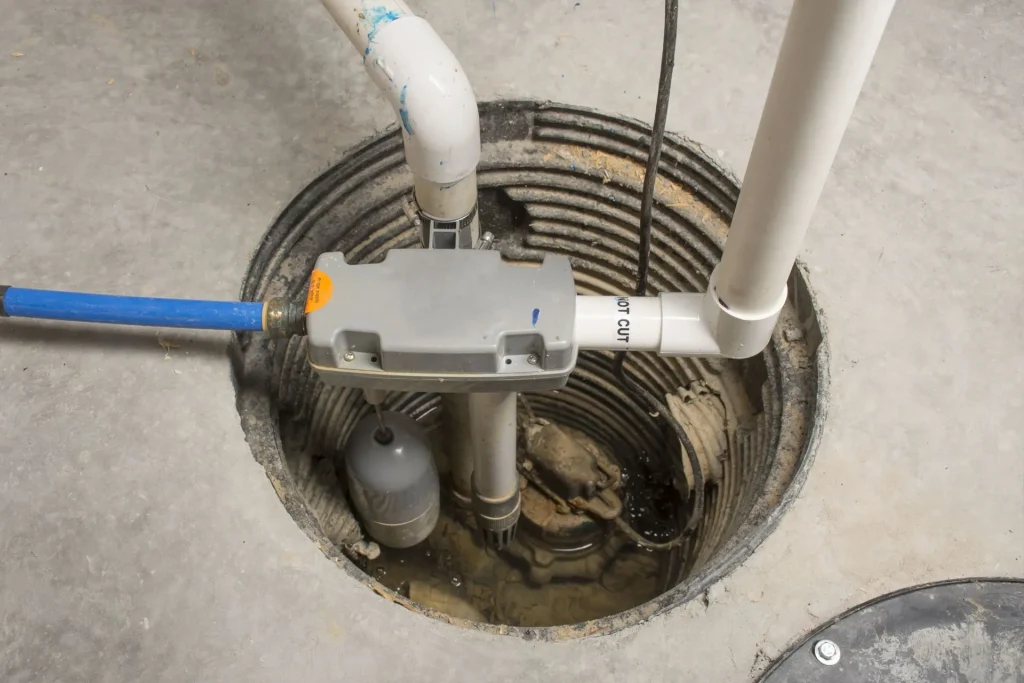
An interior system typically includes a perimeter channel or drain, a sump basin with pump, and a wall treatment or drainage path that directs moisture downward. These systems can be highly effective, especially where exterior excavation is impractical. They are common in finished basements, row houses, homes with limited side access, and cases where the leak path is concentrated at the cove joint or under-slab level.
A well-installed interior system should include thoughtful details. The sump must discharge safely away from the house. The pump should be sized for expected flow, not just chosen off the shelf. In areas prone to outages during storms, a battery backup is more than a nice upgrade. It can be the difference between control and a soaked basement. If the basement has a vapor problem as well, wall coverings and floor finishes need to be selected with moisture tolerance in mind.
Still, interior systems are not a cure for every condition. They do not relieve all moisture from the wall assembly, and they do not repair exterior masonry deterioration. If a block wall is bowing, cracking significantly, or showing prolonged saturation damage, structural assessment comes first. Waterproofing should never be used to disguise a foundation issue that needs engineering attention.
Crack repair is effective when the crack is the problem
Not every wet basement needs a full perimeter system. Sometimes one or two foundation cracks are responsible for most of the seepage. In poured concrete walls, low pressure injection with epoxy or polyurethane can be an excellent repair if the crack is accessible and the wall is otherwise sound.
The type of material matters. Epoxy can bond the crack structurally in appropriate situations, while polyurethane is often used to stop active water because it can expand and seal irregular pathways. The right choice depends on crack behavior, wall condition, and whether movement is ongoing.
What does not work well is smearing sealant over the inside face and hoping for the best. Surface patching may look tidy for a season, but if water pressure persists behind it, the leak usually finds the edge or opens a nearby route. A crack repair should fill or seal the actual depth of the defect, not just hide the stain.
This is where diagnosis matters again. If you have multiple cracks, or if the same crack reopens, settlement or soil movement may still be active. Fixing the crack without understanding the movement pattern can lead to repeat repairs.
Mold, odor, and damaged finishes are telling you the basement is still losing
People often judge basement moisture by whether they can see standing water. That is too narrow a standard. If the space smells musty, if carpet tack strips are rusting, if baseboards swell, or if stored paper items feel damp, the basement is still taking on moisture. Persistent humidity after rain often means seepage is present at a low level even when puddles never form.
Finished basements hide this especially well. Water can sit behind drywall, under vinyl plank flooring, or inside insulation cavities long before it becomes obvious in the room. By the time staining appears, the materials behind the surface may already be compromised. In one basement I inspected, the homeowner had only noticed a faint odor. Behind the lower drywall, the metal studs were rusting and the fiberglass batt insulation was wet along nearly twenty feet of wall.
This is why a successful waterproofing strategy should include not only leak control but also sensible material choices. If a basement has a history of seepage, avoid finishes that trap moisture tightly against the wall. Leave inspection access where possible. Use moisture-tolerant trim and flooring systems. The goal is not just to stop visible water, but to reduce the chance that a small future event turns into hidden damage.
What a reliable waterproofing plan usually includes
When https://collinofjt988.rivertonbrief.com/posts/how-to-spot-early-moisture-problems-before-basement-waterproofing-is-urgent seepage has been recurring for more than one season, I like to think in layers rather than single products. Durable results usually come from combining several modest corrections rather than relying on one dramatic promise.
A practical plan often includes the following:
- control roof runoff with clean gutters and extended downspouts
- correct grading and surface drainage near the foundation
- repair specific entry points such as cracks or failed penetrations
- add interior or exterior drainage where hydrostatic pressure remains
- manage indoor humidity so residual dampness does not become mold
That sequence is important. If you skip straight to an interior system while leaving a major roof discharge at the wall, you are paying to manage water that never should have reached the foundation.
Choosing between interior and exterior Basement Waterproofing
Homeowners often ask which method is better. The honest answer is that the better method is the one that matches the building, the site, and the failure mode.
Exterior work is often preferable when the leak source is clearly outside the wall envelope, access is reasonable, and long-term wall protection matters. It stops the problem earlier in the water path. It is also attractive for homes undergoing major landscape renovation, because the excavation disruption is easier to absorb at that stage.
Interior systems are often the more practical choice when access outside is blocked by neighboring structures, additions, paved areas, or mature landscaping that the owner does not want disturbed. They also make sense where water is entering through the cove joint or under the slab, because those are locations where interior collection can be very effective.
Cost varies widely by region, layout, depth, and complexity. Be cautious with any estimator who gives a one-size-fits-all answer after a five-minute walk-through. A reliable contractor should ask about timing, rainfall patterns, past repairs, finished spaces, sump discharge routes, and what has already been observed during storms. Waterproofing is part building science and part detective work.
Red flags when hiring a contractor
A wet basement makes people vulnerable to sales pressure, especially after a storm. That is when broad claims and dramatic demonstrations tend to show up. Some companies are excellent. Some are not. The challenge is telling them apart before the contract is signed.
Watch for a few warning signs. A contractor who ignores exterior drainage and jumps immediately to the most expensive system is not diagnosing thoroughly. One who promises a wall coating will stop hydrostatic pressure on its own is overselling. A bid that skips discharge details, backup power options, cleanup scope, or finish restoration is incomplete. And if the explanation relies more on fear than on evidence, step back.
Good waterproofing contractors usually have a calm, methodical way of working. They look for patterns. They ask when the seepage happens, not just where. They explain what their system does and what it does not do. Most importantly, they can tell you why your basement is wet in plain language.
Maintenance is part of keeping seepage from coming back
Even a properly waterproofed basement needs routine attention. This is not a sign of failure. It is simply how buildings work. Gutters clog. Soil settles. Sump pumps age. Window wells fill with leaves. Exterior caulking shrinks and separates. Small maintenance lapses can reopen the exact conditions that caused the original problem.
If your basement has had recurring seepage before, treat it like a system worth checking a few times a year. After major storms, walk the perimeter. Confirm downspouts stayed connected. Test the sump pump. Look at basement corners and around penetrations for fresh staining. These are quick habits, but they catch problems early.
I also recommend keeping at least some part of the basement easy to inspect. Floor-to-ceiling storage pressed tightly against foundation walls hides leaks until damage spreads. A few inches of clearance and periodic visual checks are simple insurance. In homes with finished basements, removable access panels in utility areas can be very useful.
The end goal is not just a dry floor
People understandably focus on stopping puddles, but the real objective is broader. A successful waterproofing job protects air quality, preserves finishes, reduces mold risk, and lowers the chance of structural deterioration over time. It also changes how confidently the space can be used. A dry, stable basement becomes storage you can trust, mechanical space that stays cleaner, or living area that does not carry a damp smell every spring.
Recurring seepage is rarely solved by luck or by another coat of something on the inside wall. It stops when water is redirected, pressure is relieved, and weak points are repaired with a method suited to the actual cause. That is what effective Basement Waterproofing looks like in practice. Not a magic product, but a series of sound decisions made in the right order.
If you approach the problem that way, even a basement that has leaked for years can usually be brought under control, and kept there.
ARD Waterproofing
98 Smull Ave, West Caldwell, NJ 07006, United States
+1 917-691-8411
FAQ About Basement Waterproofing
Can you 100% Waterproof a Basement in West Caldwell?
A properly designed system can substantially reduce basement water intrusion, but no method can promise protection against every flood, equipment failure, or future change in site conditions. The first step is identifying whether moisture comes from surface runoff, groundwater, plumbing, or condensation. Solutions may include grading and gutter improvements, drainage, foundation repairs, and a sump system. Review the specific coverage and exclusions of any written warranty.
How much does it cost to professionally waterproof a basement in NJ?
There is no single price that fits every basement. Cost depends on the cause of the leak, the area needing work, access, excavation requirements, drainage design, sump equipment, and restoration of disturbed finishes or landscaping. Request an on-site assessment and an itemized written estimate that explains the scope, exclusions, and maintenance requirements before comparing proposals.
How long does foundation waterproofing last in West Caldwell, NJ?
Service life varies with the waterproofing materials, installation quality, soil and water conditions, and maintenance. Drainage components and pumps may require servicing or replacement even when other parts of the system remain functional. Keep gutters, drainage outlets, and sump equipment maintained, and have recurring leaks or changes in foundation condition assessed. Ask for product-specific expectations and written warranty terms rather than relying on one lifespan for the entire system.